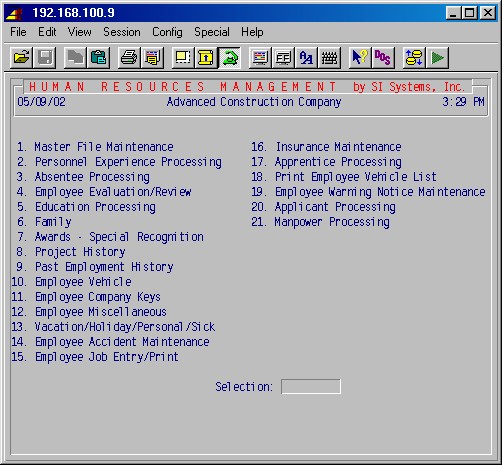
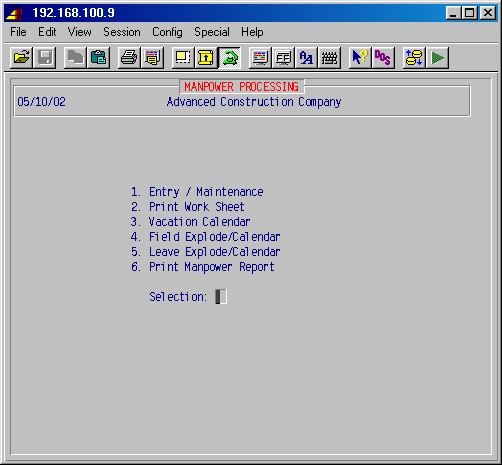
From the main menu, selecting 18 Human Resources will display the above menu.
SI Systems' Human Resources Management Module is designed to facilitate the
management of detailed personnel information in a large company or a smaller
company that wishes to better organize employee records. This detailed information
will assist your company's compliance with the various federal and state reporting
regulations, including OSHA, unemployment compensation and workman's
compensation, as well as union regulations. Required OSHA safety classes and
other required classes and seminars may be tracked and recorded with ease.
Accurate detailed records and procedures concerning absences, injuries, reviews, verbal and written warnings, promotions, and work history may help you minimize the impact of potential employee lawsuits against your company.
Working in conjunction with the payroll module, human resources management will allow you to catalogue employee information relating to absenteeism, vacations, holidays, sick time and personal time, assigning points for unexcused absences and prompting verbal and written warning letters. Annual reviews, family information, current and prior education, awards, project history, past employment history, employee vehicle, employee keys, and miscellaneous information are easily and permanently recorded.
A variety of reports are available including absentee point and warnings, absentee history, calendar vacation accrual, employee reviews, apprentice, employee vehicle, and anniversary vacation hours.
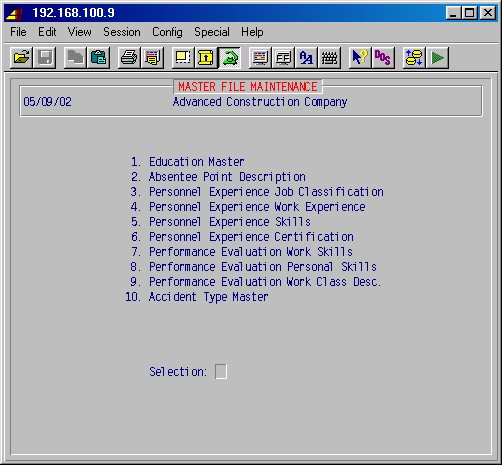
TopThis selection presents the following menu:
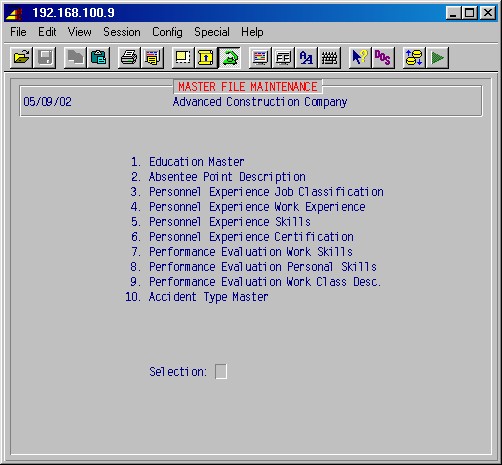
This procedure is used to set up the master list of education classes and training meetings to be used in step 18-5-1: Current Education. This selection will display the following input screen :
Use the ARROW, PAGE, ENTER, INS and DEL keys to update, add or delete training classes from this master list. The system will use the ID codes you create and each code must be unique. The education description may be anything that will help you describe the unique ID code for that class. When you are finished, press END to leave this area, and you'll be prompted:
Print Master List:
Type Yes and press ENTER if you want to print the list of education masters.
This procedure allows you to set up a master list of absence codes and points to be used by the payroll module to record time an employee should have been on the job, but wasn't, assigning points for the absences which prompt warning notices. These codes may be used only in time card entry by employee, if time is designated as "p"- personal, or "s" - sick.
Warning notices are printed in step 18-3-2: Print Absentee Points & Warnings, at point levels of 5, 8, and 10 as follows:
5 points = 1st notice
8 points = 2nd notice
10 points = final notice
After a consecutive 60 day period of no absences, the oldest points drop from the list of total points accumulated for warning notices and disciplinary action (step 18-3-2). Note however, that the absentee history (step 18-3-3) remains intact. After another consecutive 60 days with no absences, the next oldest points drop off and so on every 60 days.
This selection will display the following input screen :
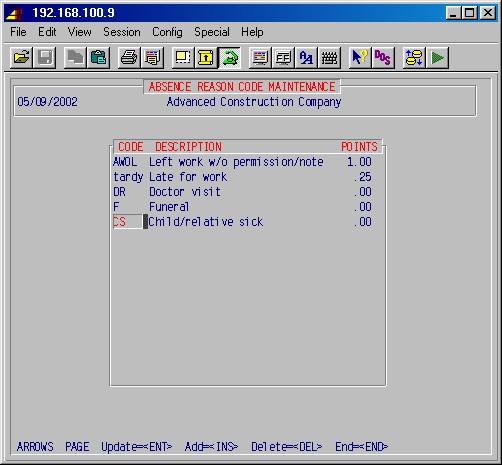
Use the ARROW, PAGE, ENTER, INS and DEL
keys to update, add or delete absentee point codes, descriptions, and point
values from this master list. The system will use the codes you create and
each code must be unique. The descriptions may be anything that will help
you describe the unique absence code. The point value may be anything including
"0" if you wish. When you are finished, press END to leave
this area, and you'll be prompted:
Print reason code list:
Type Yes and press ENTER if you want to print the list of reason codes.
This procedure is used to set up the master list of job experiences, used in 18-2-2: Enter Employee Information. This selection will display the following input screen :
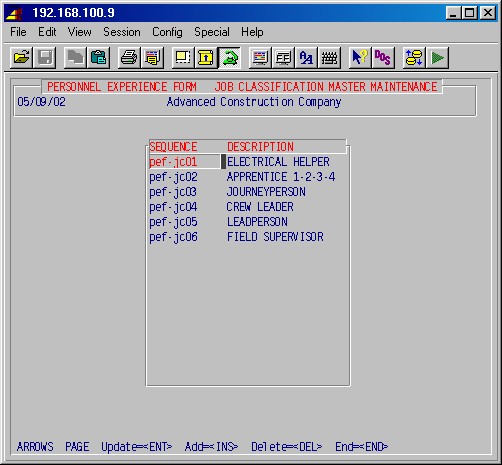
TopUse the ARROW, PAGE, ENTER, INS and DEL keys to update, add or delete experience codes from this master list. The system will assign unique ID codes. The description may be anything that will help you describe the unique ID code. When you are finished, press END to leave this area.
This procedure is used to set up the master list of work experiences, used in 18-2-2 Enter Employee Information. This selection will display the following input screen :
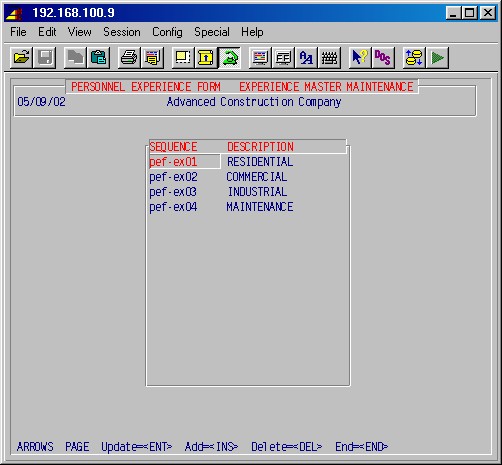
Use the ARROW, PAGE, ENTER, INS and DEL
keys to update, add or delete experience codes from this master list. The
system will assign unique ID codes. The description may be anything that
will help you describe the unique ID code. When you are finished, press
END to leave this area.
This procedure is used to set up the master list of skills, used in 18-2-2 Enter Employee Information. This selection will display the following input screen :
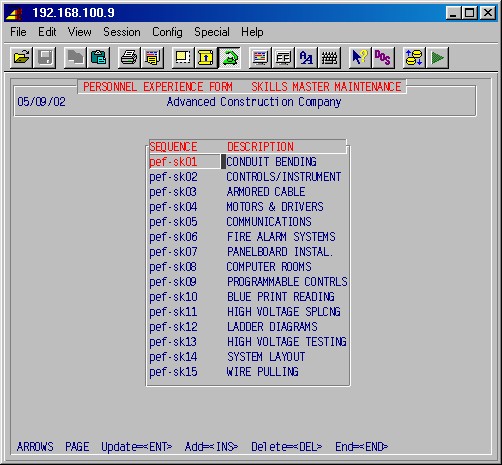
TopUse the ARROW, PAGE, ENTER, INS and DEL keys to update, add or delete skill codes from this master list. The system will assign unique ID codes. The description may be anything that will help you describe the unique ID code. When you are finished, press END to leave this area.
This procedure is used to set up the master list of certifications, used in 18-2-2 Enter Employee Information. This selection will display the following input screen :
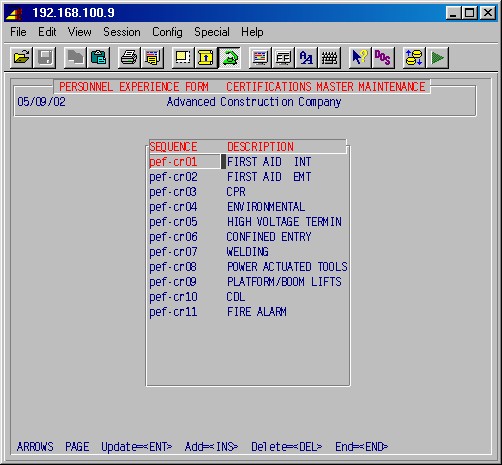
TopUse the ARROW, PAGE, ENTER, INS and DEL keys to update, add or delete certification codes from this master list. The system will assign unique ID codes. The description may be anything that will help you describe the unique ID code. When you are finished, press END to leave this area.
This procedure is used to set up the master list of performance evaluation work skills. This selection will display the following input screen :
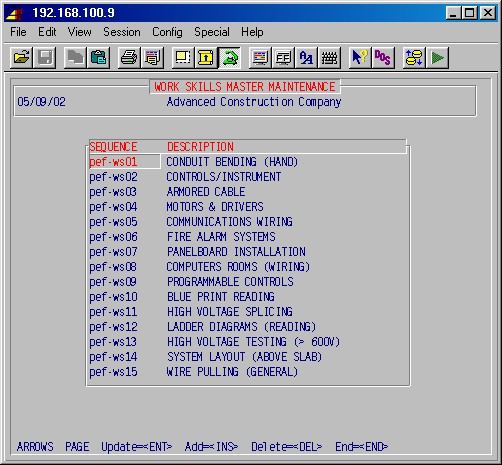
TopUse the ARROW, PAGE, ENTER, INS and DEL keys to update, add or delete performance evaluation work skills from this master list. The system will assign unique ID codes. The description may be anything that will help you describe the unique ID code. When you are finished, press END to leave this area.
This procedure is used to set up the master list of performance evaluation personal skills. This selection will display the following input screen :
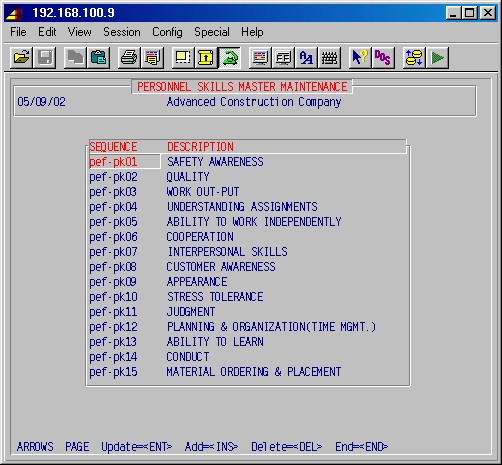
TopUse the ARROW, PAGE, ENTER, INS and DEL keys to update, add or delete performance evaluation personal skills from this master list. The system will assign unique ID codes. The description may be anything that will help you describe the unique ID code. When you are finished, press END to leave this area.
This procedure is used to set up the master list of performance evaluation work classes. This selection will display the following input screen :
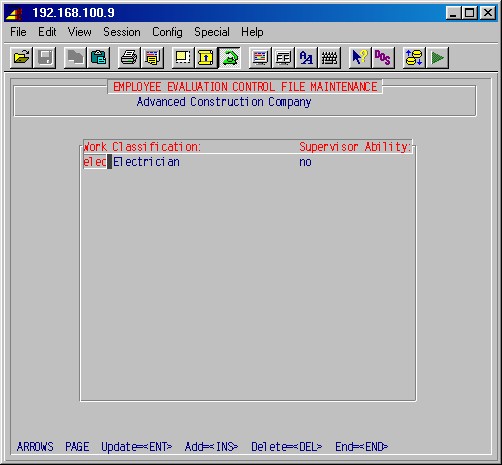
TopUse the ARROW, PAGE, ENTER, INS and DEL keys to update, add or delete performance evaluation work classes from this master list. The system will assign unique ID codes. The description may be anything that will help you describe the unique ID code. When you are finished, press END to leave this area.
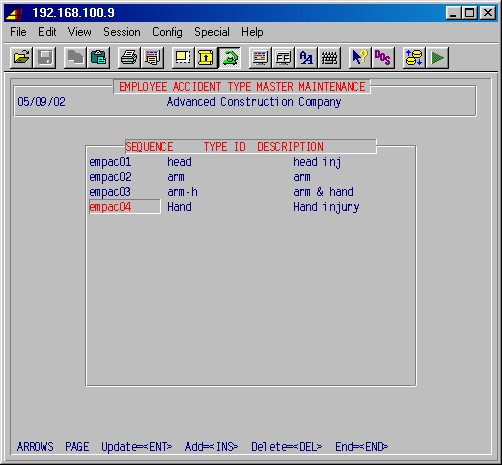
This procedure is used to set up the master list of accident types. This selection will display the following input screen :
Top
Use the ARROW, PAGE, ENTER, INS and DEL keys to update, add or delete accident types from this master list. The system will assign unique ID codes. Enter a type and description for each. The description may be anything that will help you describe the unique ID code. When you are finished, press END to leave this area.
This selection will present this menu:
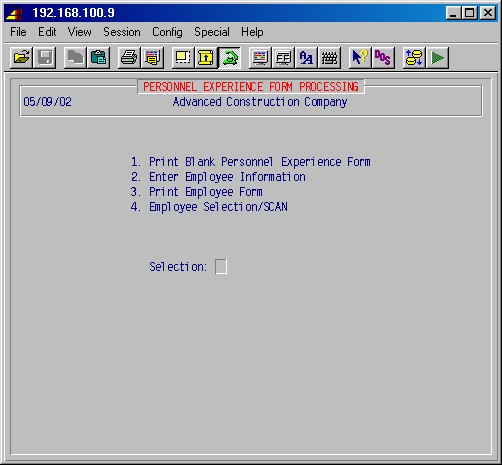
This selection will prompt you with the printer selection screen and then print a blank personnel experience form.
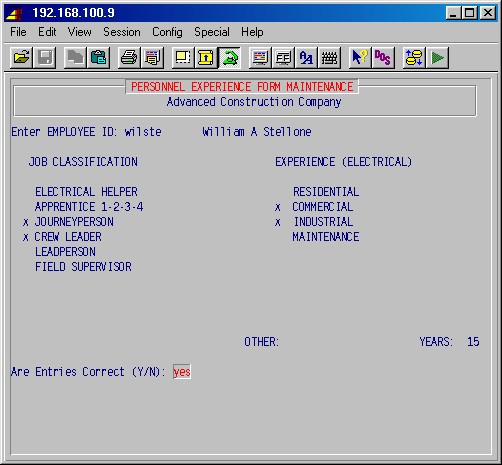
This selection allows entry of employee experience data. You'll first be prompted:
Enter EMPLOYEE ID:
Type the ID [H] of the employee for which you want to enter experience data and press ENTER, and you'll be prompted with this first screen:
Each of the skills, as set up in 18-1-5, will be listed, and you may enter an "X" in front of any that apply.
OTHER
Enter any other skills if applicable.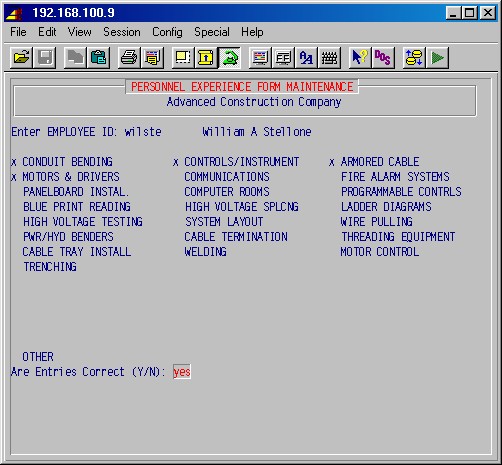
Are Entries Correct (Y/N):
If you need to go back and make changes, type No. Otherwise type Yes. Press ENTER.Next this third screen will appear:
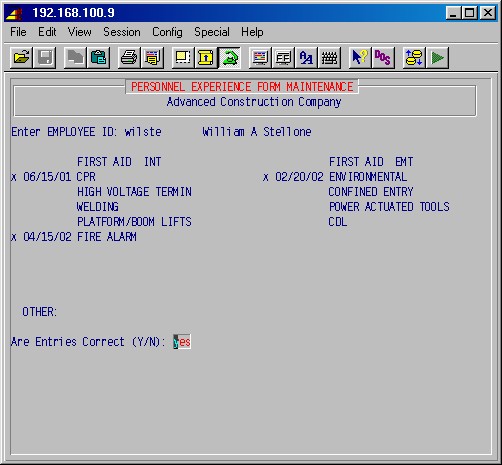
Each of the certifications, as set up in 18-1-6, will be listed, and you may enter an "X" and the date of the certificate in front of any that apply.
OTHER
Enter any certification if applicable.Are Entries Correct (Y/N):
If you need to go back and make changes, type No. Otherwise type Yes. Press ENTER.Next this fourth screen will appear:
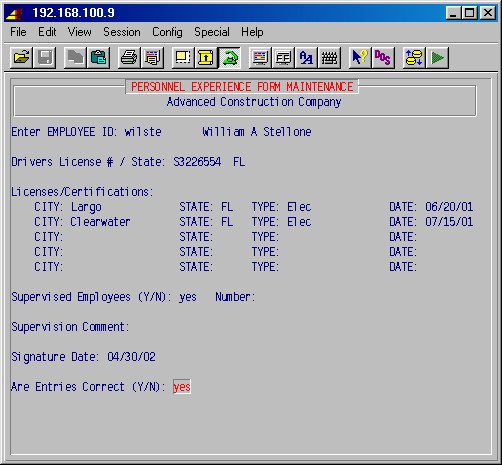
TopDrivers License # / State:
Enter the employee's drivers license number, and state where issued.Licenses/Certifications: CITY: STATE: TYPE: DATE: / /
Enter the title, city, state, type and date for any licenses or certifications the employee may have.Supervised Employees (Y/N): Number:
Answer Yes and enter the number of employees this employee has supervised, if any.Supervision Comment:
Enter any comment regarding this employee's supervisory experience.Signature Date:
Enter the date the employee filled in and signed his experience form.Are Entries Correct (Y/N):
If you need to go back and make changes, type No. Otherwise type Yes. Press ENTER.You'll next be prompted for another employee ID. To exit this procedure, simply leave the employee ID blank, and press ENTER.
This selection allows printing an employee's experience form, as entered in 18-2-2 above. It will prompt you:
Enter EMPLOYEE ID:
Type the ID [H] of the employee for which you want to print the experience form, and press ENTER, and you'll be prompted with the printer selection screen.
When printed, you'll again be prompted for an employee ID. To exit this procedure, simply leave the employee ID blank, and press ENTER.
This selection allows listing employees with specified experience and qualifications, typically when trying to find candidates for a position to be filled from within the company.
You'll be prompted:
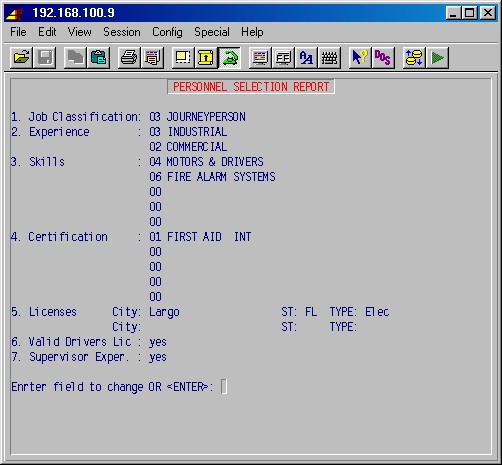
TopJob Classification:
Enter the number of the job classification, as set up in 18-1-3.Experience
Enter up to two work experience numbers, as set up in 18-1-4.Skills
Enter up to five skill numbers, as set up in 18-1-5.Certification:
Enter up to five certification numbers, as set up in 18-1-6.Licenses City: ST: TYPE:
Enter up to two licenses/certifications needed, as entered in 18-2-2, fourth screen, with city, state and type.Valid Drivers Lic:
Answer Yes if a valid drivers license is required for this position.Supervisor Exp.:
Answer Yes if supervisory experience is required for this position.Enter Field To Change OR <RETURN>:
If you want to go back and change an entry, type the number of the appropriate field, and press ENTER. To start the search, just press ENTER and a list of employees with the specified requirements will be shown on the screen.
Next you'll be prompted:
Print Selection List (Y/N):
Answer Yes if you want to print the list just shown.If you answered Yes to the above question, you'll then be prompted:
Print Personnel Experience Forms (Y/N):
Answer Yes if you want have the personnel experience forms printed for each of the employees just shown, rather than just a list showing employee ID, name, city and state.
This selection will present this menu:
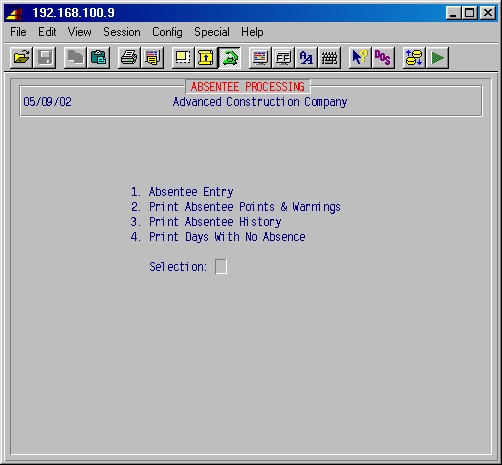
This procedure allows you to make manual entries for absences not recorded in payroll time entry. This is normally used to enter past history when setting up the system or setting up this module for the first time.
Since absentee entries made in payroll time entry are loaded into this area, corrections to those entries from payroll may also be made in this area. This selection will first prompt:
Enter employee ID:
Enter the ID [H] of the employee and press ENTER. If it is a valid ID, the system will display the following entry screen :
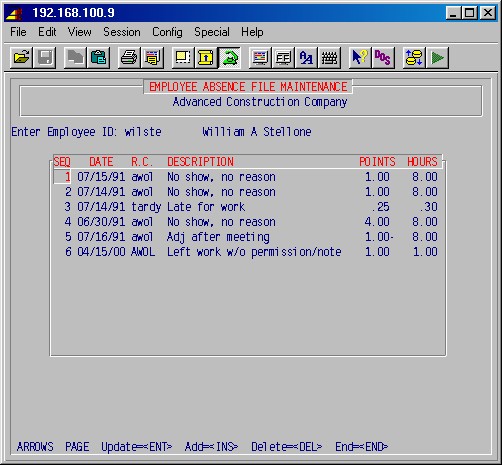
TopUse the ARROW, PAGE, ENTER, INS and DEL keys to update, add or delete absence records.
To add a line, press INS and fill in the date and reason code [H] for the absence. The system will fill in the description from the information set up in 18-1-2. You may now change the number of points if you wish and record the time in hours for this absence. When you are finished, press END to leave this area.
This procedure will print a report showing actual absentee points and
warnings. This is not the complete history, which may be printed in 18-3-3,
but only the active points and warnings based on the rules described in
18-3-2 Absentee Point Description. This report
may be printed for all employees or a specified employee. This selection
will display the following input screen:
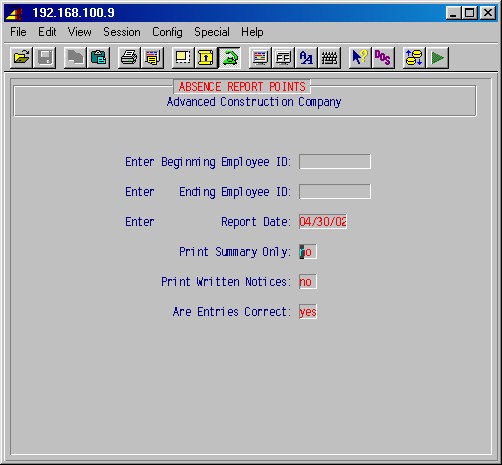
TopEnter Beginning Employee ID:
Enter Ending Employee ID:
For one employee, specify the employee ID in both fields, or just press ENTER in both fields to print a report for all employees.Enter Report Date:
Enter the date for this report.Print Summary Only:
You may print a summary report with only total points and hours by employee if you answer this question YES. To print a detailed report showing each absence, date, number of points, and number of hours, plus the total points and hours, answer this question NO.Print Written Notices:
You may print written notices for all employees who have accrued sufficient points to receive a warning notice by answering YES. These notices are printed in accordance with the following schedule:5 points = 1st notice
8 points = 2nd notice
10 points = final notice (termination)Are Entries Correct:
When the entries are correct, press just ENTER and select the printer number and the number of copies and your report will be printed. If you are also printing notices, you will also be prompted for the printer number and number of copies for the notices.
This selection will print a report of the history of employees' absence points and hours.
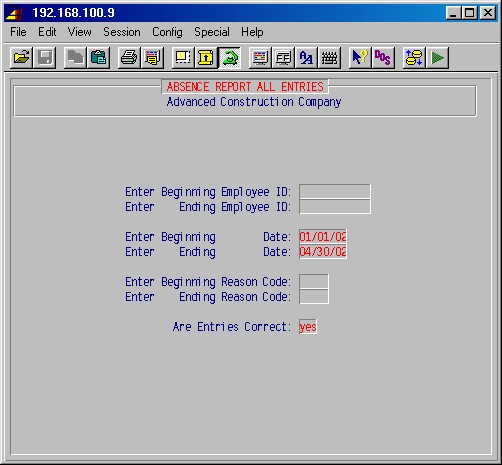
TopEnter Beginning Employee ID:
Enter Ending Employee ID:
Enter a range of employee IDs to list, or just leave blank for all.Enter Beginning Date:
Enter Ending Date:
Enter a date range or just leave blank for all.Enter Beginning Reason Code:
Enter Ending Reason Code:
Enter a range of reason codes, as set up in 18-1-2, or just leave blank for all.Are Entries Correct:
Answer Yes when the above entries are correct, and you'll be prompted with the printer selection screen.
This selection will list each employee, showing employee ID, name, date from which the employee has had no absence, and the number of days with no absence.
This selection will present this menu:
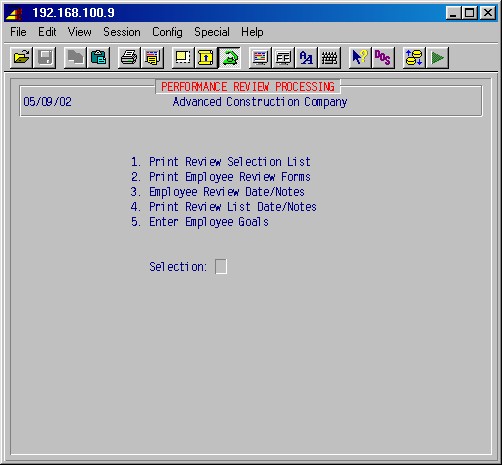
This selection will print a list of employees due for a review, showing employee ID, name, last review date, next review date, hire date and whether the employee's rate has been previously adjusted.
This selection will prompt for an employee ID and print an evaluation form for the employee, to be filled out by the reviewing supervisor.
To leave this selection, leave the employee ID blank and press ENTER.
This procedure allows you to input or update the employee review dates (last review date and next review date) and employee review notes. This information is the same as that entered in 5-1-1 Employee Maintenance, on the first and third screens, but this is just an easier way to access that information.
This procedure is also a way to allow a non-payroll employee to access this review information without having access to the employee's salary information in 5-1-1.
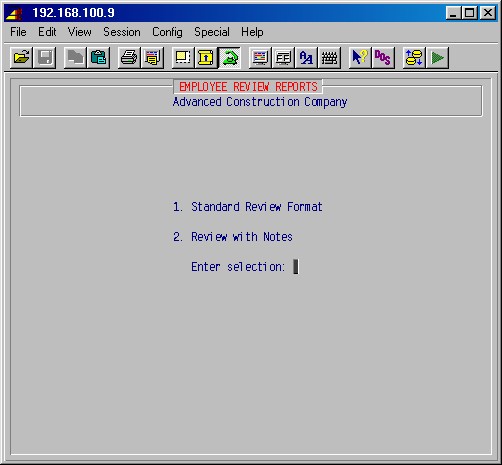
The information in this area is the information that prints out on the employee review reports in step 18-4-4-2 Review With Notes. This selection will first prompt for the employee ID and then display the following input screen :
Enter employee ID:
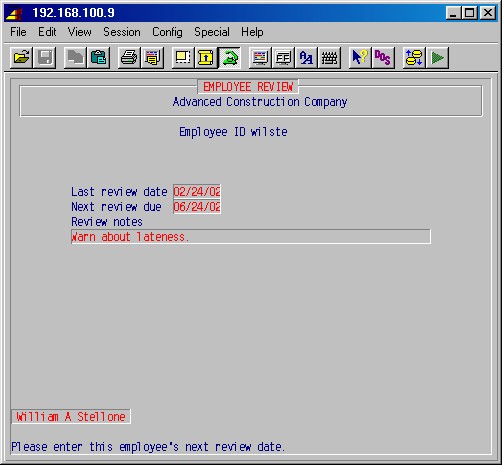
TopEnter or update the last review date, the next review date, and the review notes as required and press ENTER again after the review notes to exit this area.
This report will list employees with next-review dates in a specified date range, showing employee ID, name, phone number, social security number, review date and current pay rate.
This report will list employees with next-review dates in a specified date range, showing employee ID, name, review date and comments.
Use this procedure to enter or update employee goals. You'll be prompted for an employee ID, and then allowed to enter up to four lines of employee goals.
This selection presents the following menu:
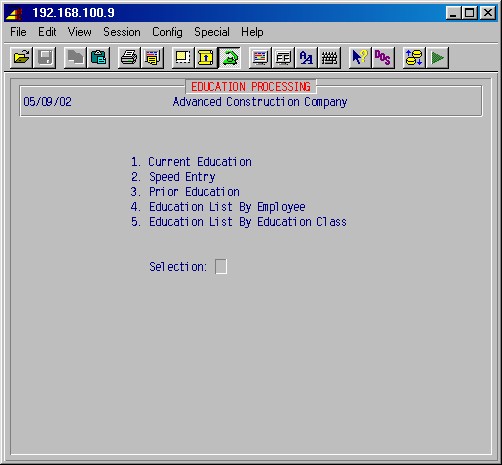
This procedure is strictly informational and provides a place to record meetings and classes each employee has attended. Government, union, and company mandated meetings (such as OSHA safety meetings) are easily recorded in this area. The meeting and class ID codes used in this area are set up in 18-1-1 Education Master. This selection will first prompt for the employee ID and then display the following input screen :
Enter employee ID:
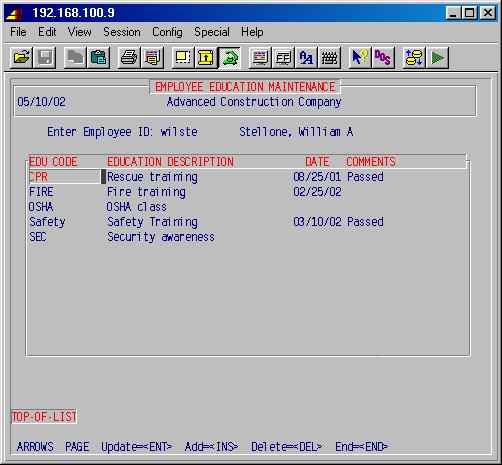
TopUse the ARROW, PAGE, ENTER, INS and DEL keys to update, add or delete education records.
To add a line, press INS and fill in the education code [H], the date and any comments.The system will fill in the description from the information set up in 18-1-1. When you are finished, press END to leave this area.
This selection allows entry of up to 75 employee IDs at a time for a selected education code. This would typically be used when a number of employees have just completed a training course or seminar.

ID Code:
Enter the code for this education, as set up in 18-1-1, or enter a new code.
Description:
If the code entered above was already set up in 18-1-1, the description will automatically display. If not, enter the description for this new code.
Date:
Enter the date this education was completed.
Next, enter each employee ID of the employees who have completed this education. Press F1 when done.
Are Entries Correct:
If all entries are correct, answer YES.
If you need to go back and correct entries, answer NO.
You'll again be prompted for an ID Code. Leave this blank and press ENTER to exit this procedure.
This procedure is strictly informational and provides a convenient place to record and access historical data about an employee's prior education, awards, degrees, licenses, etc. The system will first prompt for and employee ID and then display the following input screen :
Enter Employee ID:
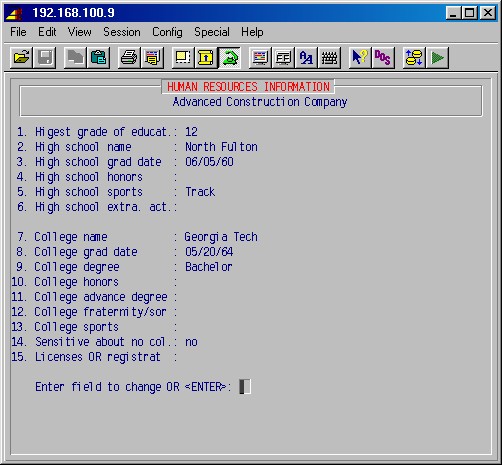
TopTo enter or update information on this screen, type a field number to be changed, press ENTER and type the information. When you are finished, press just ENTER to exit this area.
This selection will print a page for each employee showing each education code and date done, if any.
You'll be prompted:
Enter Beginning Class ID:
Enter Ending Class ID:
Enter a range of education codes (as set up in 18-1-1), or leave blank for all.Enter Beginning Employee ID:
Enter Ending Employee ID:
Enter a range of employee IDs to print or leave blank for all.Are Entries Correct:
Answer YES when the above entries are correct, and you'll be prompted with the printer selection screen.
This selection will print a list of employees having completed a specified education class, showing employee ID, name and date done. The total count of employees having completed the specified class will also be shown.
You'll be prompted:
Enter Education Class ID:
Enter the ID of the education class to print and press ENTER.
This procedure is strictly informational and provides a place to record various information about the employee's family, special interests, and other personal information. This selection will first prompt for the employee ID and then display the following input screen :
Enter employee ID:
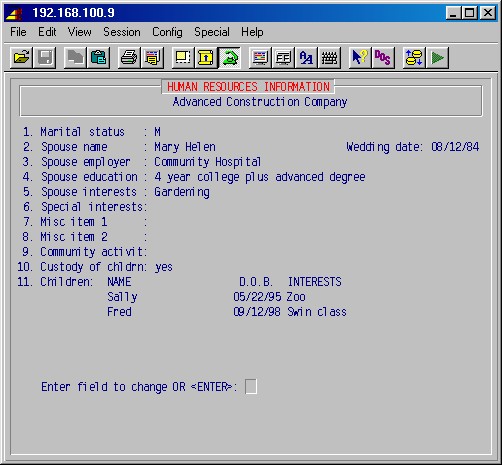
To enter or update information on this screen, type a field number to be changed, press ENTER and type the information. When you are finished, press just ENTER to exit this area.
TopThis procedure is strictly informational and provides a convenient place to record and access historical data about an employee's awards and special recognition. The system will first prompt for and employee ID and then display the same screen as in 18-5-3, followed by this entry screen :
Enter employee ID:
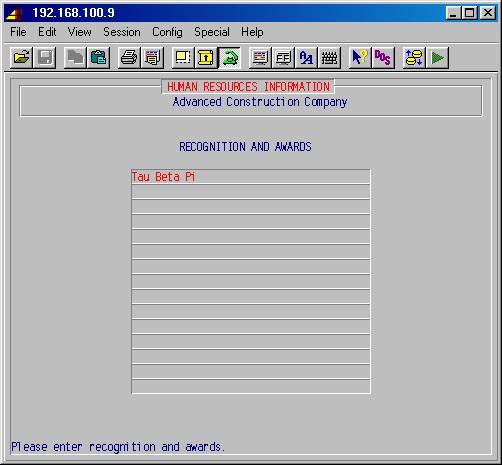
This is a free form area where you may type as much or as little as you want up to 15 lines of information. Simply type what you wish, pressing ENTER after each line to move to the next line. When you are finished, press F1 and then ENTER to exit this area.
TopThis procedure is strictly informational and provides a convenient place to record and access historical data about which projects, clients, and supervisors an employee has worked for. The system will first prompt for and employee ID and then display the following input screen :
Enter Employee ID:
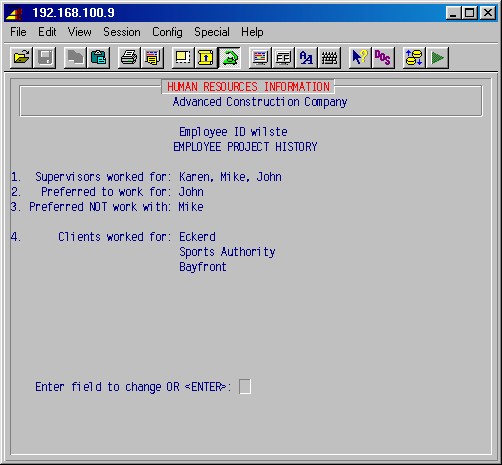
To enter or update information on this screen, type a field number to be changed,
press ENTER and type the information. Field #4 is a free form entry area
with 10 lines for information. Simply type what you wish, pressing ENTER
after each line to move to the next line. When you are
finished, press F1 and then ENTER to exit this area.
This procedure is strictly informational and provides a convenient place to
record and access historical data about an employee's previous employers, dates
of employment, supervisors, and salary. This area is designed to build files
which may be cross referenced for retrieval of
common data in future releases of this module. The system will first prompt
for an employee ID and then display the following input screen :
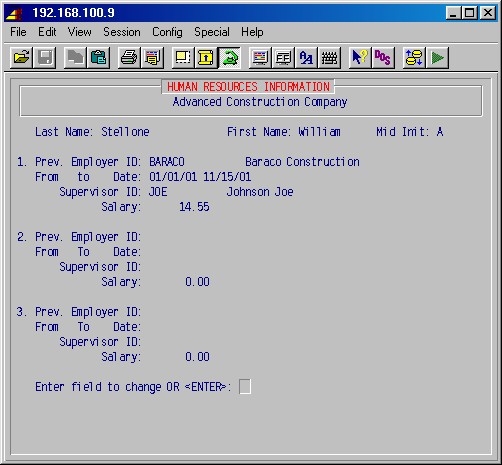
Enter employee ID:
To enter or update information on this screen, type a field number to be changed,
press ENTER and type the information. Each of the three field numbers
allows you to enter the previous employer ID, the employment dates, the supervisor
ID, and the salary. When you are finished,
press just ENTER to exit this area.
This procedure is strictly informational and provides a convenient place to record and access data about a vehicle and company credit cards assigned to an employee. The system will display the following input screen :
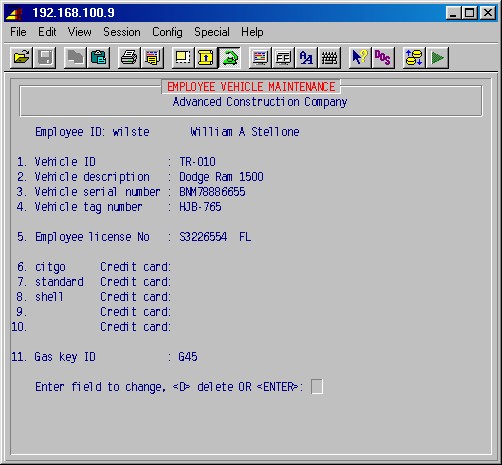
First specify the employee ID and press ENTER. If there is no record of a vehicle assigned to this employee, the system will prompt:
NO RECORD FOUND ADD: YES
Press just ENTER to start a new record. To enter or update information on this screen, type a field number to be changed, press ENTER and type the information. When you are finished, press just ENTER to exit this area.
TopThis procedure is strictly informational and provides a convenient place to record and access data about all company keys assigned to an employee. The system will display the following input screen :
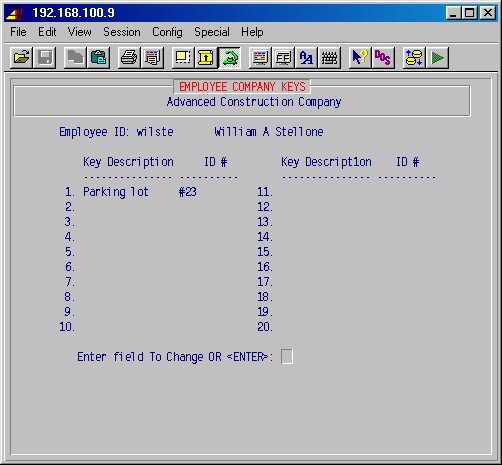
First specify the employee ID and press ENTER. To enter or update information on this screen, type a field number to be changed, press ENTER and type the information. When you are finished, press just ENTER to exit this area.
TopThis procedure provides a convenient place to record and access miscellaneous information about an employee including such things as military service, pager and car phone numbers, and when company manuals, OSHA manuals, and health plan policy manuals were issued. This area is also used to record information about a pension plan, car expenses, or third party sick pay which must be printed on the W2 forms.
This selection will first prompt for an employee ID and then display the following input screen :
Enter employee ID:
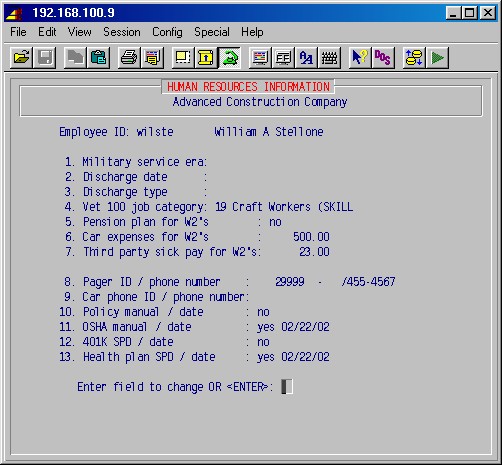
To enter or update information on this screen, type a field number to be changed, press ENTER and type the information. Some fields which may not be self-explanatory are:
#4 Vet 100 job category
These codes are used on the EEO report and the Vet100 report. Press F2 for a list of categories.
#5 Pension plan for W2's
If you answer YES, the system will check the box on the W2 which says this employee is on a pension plan. Note however, if this employee has a 401K, the W2 box is checked anyway.
#6 Car expenses for W2's
This is used to enter a dollar amount for car expenses which must be reported on the W2.
#7 Third party sick pay for W2's
This is used to enter the amount for third party sick pay which must be reported on the W2.Top
This selection will present the following menu:
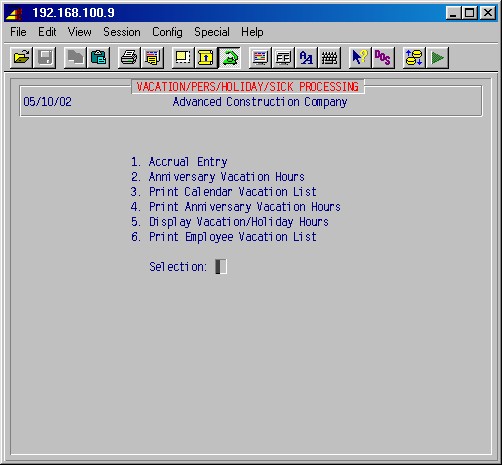
This procedure will allow you to maintain a record of vacation, personal, holiday, and sick time allowances for each employee, and review the number of hours of each taken, and the balance of time remaining in each category.
NOTE: This procedure is identical to step 5-1-5 in the payroll module and may be accessed either here or in payroll. Accessing it from this menu gives you the option of allowing an employee to update this information while not having access to the pay records in 5-1.
You will input, for each employee, the number of hours allowed and the number of hours that accrue per pay-period for each of these four categories.
The field for hours taken will be updated each pay period from the payroll system and will show a running total of the hours accumulated in each of the four categories. The running balance of hours allowed in each category will be computed and displayed in the balance field.
This selection will display the following input screen :
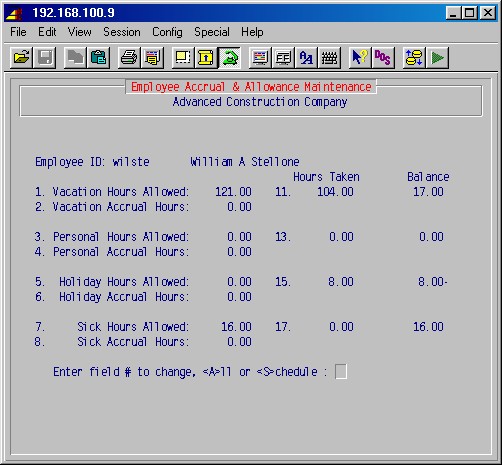
TopEmployee ID
Type the employee ID and press ENTER.The fields for hours allowed and accrual hours in the vacation, personal, holiday, and sick leave categories are normally entered when an employee is hired, and adjusted at events when these allowances change, in accordance with your personnel policies (i.e. after
probation period, after one year of service, promotions, etc.).You may change all fields at once by pressing All ENTER, or type the number of the field you wish to change and press ENTER.
Hours allowed
Type the annual number of hours allowed to this employee at this time for vacation, personal time off, holidays, and sick leave in accordance with your personnel policies, union contracts, or terms of employment.Accrual hours
Type the number of hours that accrue on a per-pay basis for each of these categories that have allowed.EXAMPLE: If an employee is eligible for a two week vacation (80 hours), and he is paid weekly (52 pay periods per year), then the vacation accrual hours for that employee is 1.54. (# hours divided by # pay-periods).
When all fields have been entered, press ENTER to exit this area.
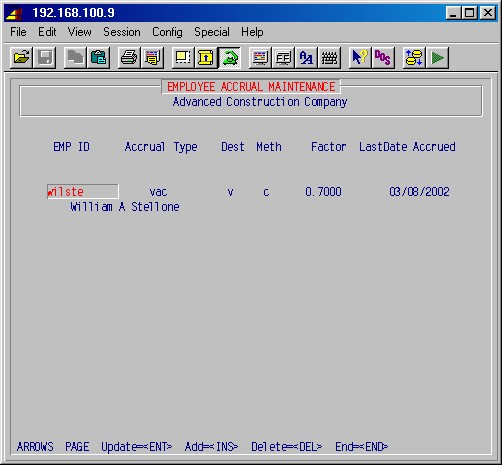
Select <S> to enter the accrual formula.
This procedure provides a way to keep track of vacation accrual hours if the eligibility for vacation is after a fixed number of hours have been worked. This is used if the employee needs a fixed number of hours to be eligible for vacation even though he may have been employed for over one year. A report of this screen may be printed in 18-13-4 Print Anniversary Vacation Hours. This selection will display the following input screen :
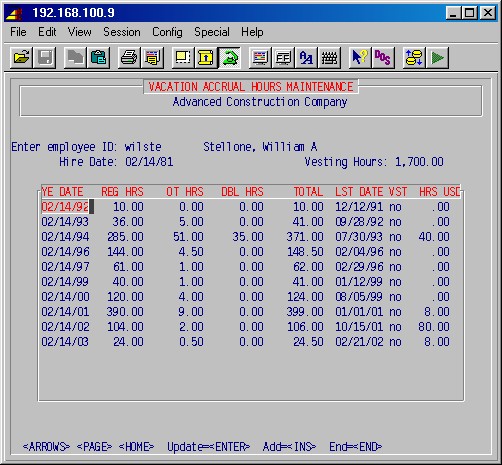
TopThe system will first prompt for the employee ID. The system will update the regular, overtime, and doubletime hours from time card entry showing the total as well as the last payroll date. The year-end date as well as the number of hours taken may be entered as needed. When you are finished, press END to exit this area.
This procedure prints a report of all employees or specified departments of employees showing by employee ID, the accrued vacation hours, hours taken, the balance of hours remaining, the employee's hourly rate, and the dollar amount of liability for this accrued but unused vacation time (hourly rate x balance of hours). This selection will display the following input screen :
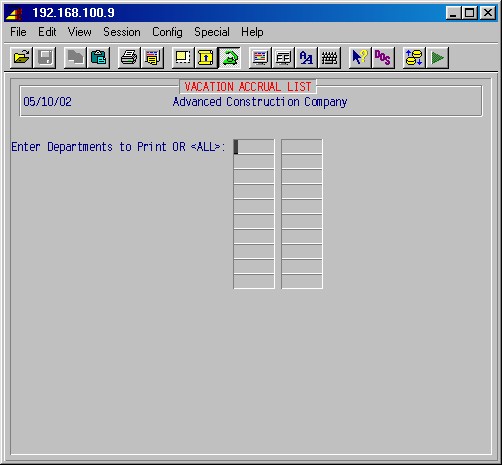
TopSpecify one or more department ID's you wish to print, or type ALL to print a report of all employees by employee ID. After you have typed in the departments, press F1. If the entries are correct, type YES, enter the printer number and the number of copies, and your report will be printed.
This procedure will print a report of employee vacation hours as shown in 18-13-2 Anniversary Vacation Hours. You may print this report for one employee or all employees. This selection will display the following input screen:

Specify the range of employees you wish to print or press just ENTER for each field to print a list of all employees. If this is correct, answer YES, select the printer and the number of copies and your report will be printed.
This selection is identical to 18-13-1 above.
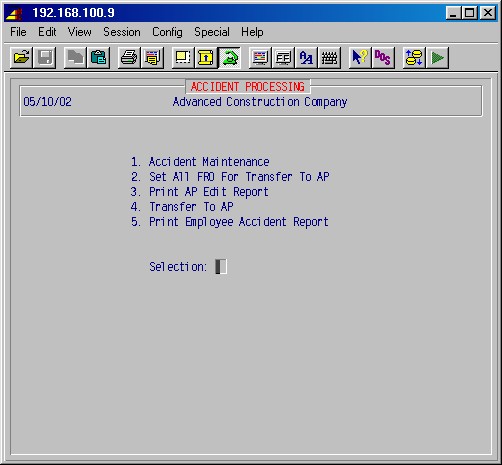
This selection will present the following menu:
This procedure will allow you to maintain a record of employee accidents and will display the following input screen :
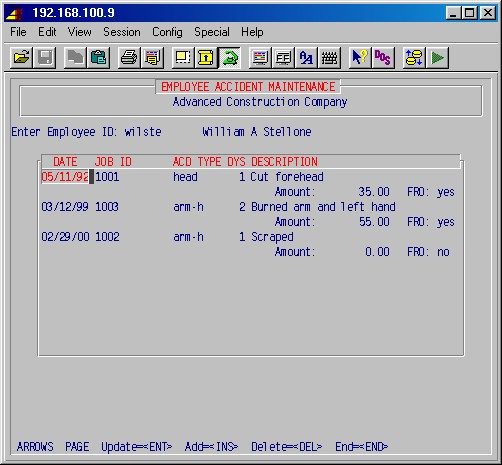
DATE
Enter the date of the accident.JOB ID
Enter the ID of the job that the employee was working on when the accident happened.ACD TYPE
Enter the type of accident, as set up in 18-1-10, Accident Type Master.DYS
Enter the number of days that the employee was off as a result of this accident.DESCRIPTION
Enter a brief description of the accident.Amount:
The amount spent on treatment.FRO:
Answer Yes if the following vendor invoices may be transferred to AP in the following steps.You'll next be allowed to enter or update vendor invoices incurred in connection with this accident:
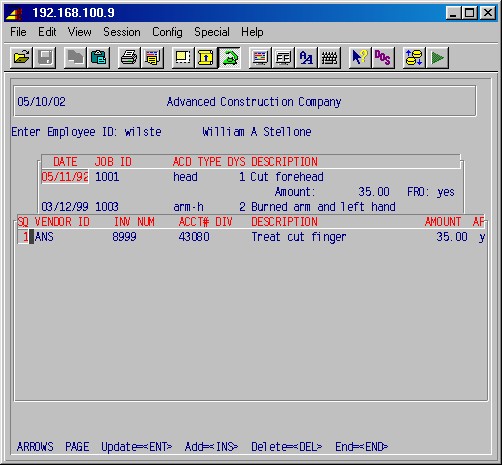
TopSQ
This is a line number automatically assigned by the system.VENDOR ID
Enter the ID [H] of the vendor whose invoice you're entering.INV NUM
Enter the vendor's invoice number.ACCT#
Enter the GL account number which this invoice will be posted to.DIV
Enter the GL division which this invoice will be posted to, if applicable.DESCRIPTION
Enter a description of this invoice.AMOUNT
Enter the amount of this invoice.AP
A P will appear in this column if this invoice has been transferred to the AP module, and you'll not be allowed to delete this line or change the amount. If you want to mark this invoice to be transferred to AP when running step 18-14-4 below, answer Y here, otherwise leave it blank.Use the ARROW, PAGE, ENTER, INS and DEL keys to update, add or delete AP invoices for this accident. When you are finished with AP invoices, press END to return to the accident maintenance screen.
Note that the total of amounts on this screen must match the amount entered on the previous screen before you're allowed to leave this screen (add adjusting lines if needed).
Use the ARROW, PAGE, ENTER, INS and DEL keys to update, add or delete accidents for this employee. When you are finished with this employee, press END.
To leave this area, leave the employee ID blank and press ENTER.
This is the first step in transferring invoices entered above to the AP module. It will mark all entries where FRO was answered Yes to be transferred. As a safeguard you'll first be prompted:
Set All FRO AP entries for transfer?
To proceed answer YES, and it will be done.
This is the second step in transferring invoices entered above to the AP module. It will list each invoice to be transferred, showing employee ID, date, vendor ID, invoice number, GL account number, division, description and amount.
Review this report and use step 18-14-1 to change invoices as needed, or to mark or unmark an invoice to be transferred (a Y in the AP column means the invoice will be transferred).
This is the last step in transferring invoices entered above to the AP module. Only when you are satisfied with the report from 18-14-3, run this step. There are no prompts for this selection.
This selection will list accidents in a selected date range for a selected range of employees, showing employee ID, name, date, job ID, type, days off, description and amount, and optionally will list AP invoices for each accident. You will be prompted:
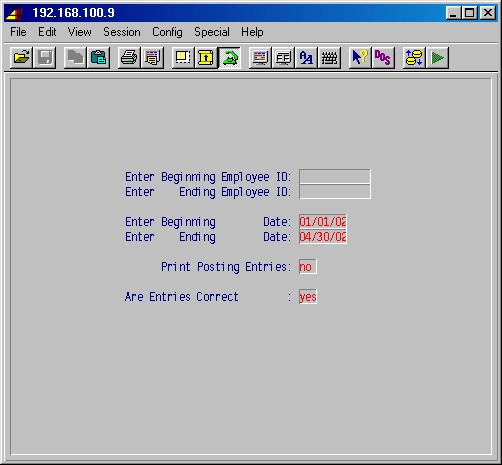
TopEnter Beginning Employee ID:
Enter Ending Employee ID:
Enter a range of employee IDs to list, or just leave blank for all.Enter Beginning Date:
Enter Ending Date:
Enter a date range or just leave blank for all.Print Posting Entries:
Answer YES if you want AP invoices listed for each accident.Are Entries Correct:
Answer YES when the above entries are correct, and you'll be prompted with the printer selection screen.
This selection allows assigning employees to a job. It generally does not
affect processing in any
module.
You'll first be prompted:
Job ID:
Enter the ID [H] of the job for which you want to maintain employees.
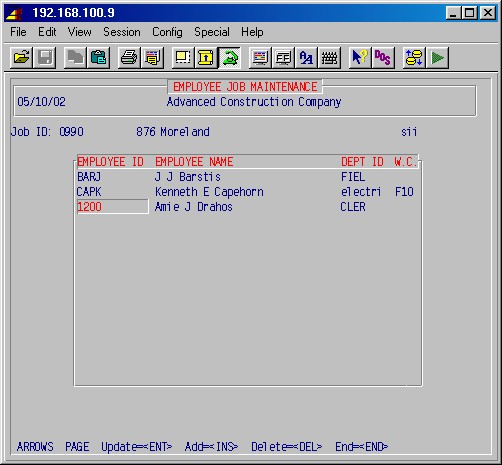
Use the ARROW, PAGE, ENTER, INS and DEL keys to update, add or delete employees for the selected job. If you press ENTER on an employee, you will prompted for a new job ID for the employee. When you are finished, press END.
To leave this procedure, leave the employee ID blank and press ENTER. You'll then be prompted:
TopPrint Job List (YES/NO):
Answer Yes if you want to print lists of employees for a selected job or all jobs, with an option to print the pay rates for individual employees.
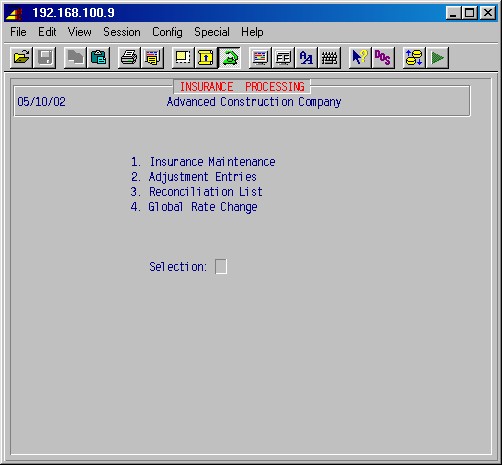
This selection allows keeping records of employee insurance and will present the following menu:
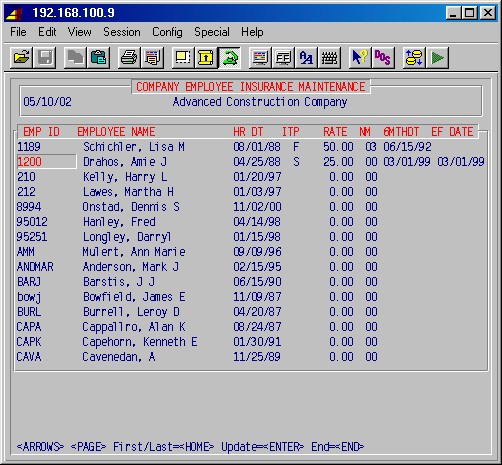
TopEach employee will be listed, showing employee ID, name and hired date.
ITP
Enter the insurance type:
s or blank for single
f for familyRATE
Enter the insurance rate to be paid.NM
Enter number of persons insured.6MTHDT
Enter the date when the employee becomes eligible (e.g. 6 months after date hired).EF DATE
Enter the effective date for this employee.Use the ARROW, PAGE and ENTER keys to update employee insurance data. When you are finished, press END.
This selection is used to record adjustments to insurance, e.g. when adding new employees or employees leaving. It does not post to or interact with any other areas of the system.
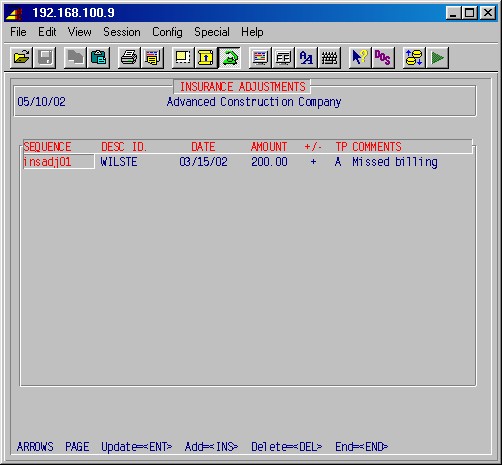
Use the ARROW, PAGE, ENTER, INS and DEL keys to update, add or delete insurance adjustments. When you are finished, press END.
This selection will print a reconciliation list around a specified date, first listing employees with effective dates prior to this date, then employees with effective dates subsequent to this date, and finally employees listed by the 6 month date, showing employees about to become eligible.
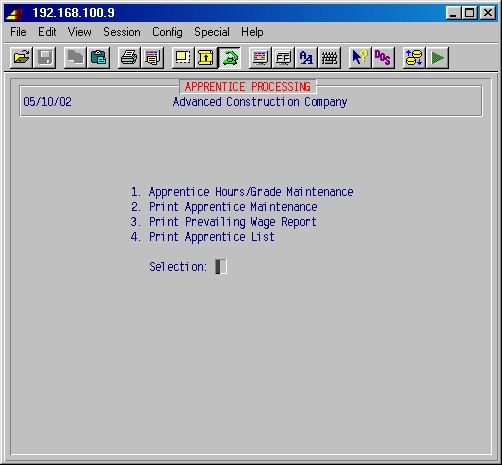
This area allows you to keep a record of apprentices, their certification and progress. This selection will present the following menu:
Use this selection to enter data for each apprentice.
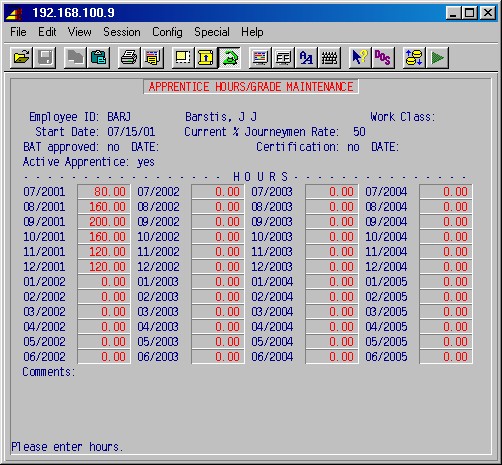
Enter the ID [H] of the apprentice. The system will display the name and work class of the employee, as entered in 5-1-1, Employee Maintenance.
Start Date:
Enter the date that the employee started as an apprentice.
Current % Journeymen Rate:
Enter the apprentice's current pay rate as a percentage of the current journeyman wage rate.
BAT approved: DATE:
Enter YES and the date, if the apprentice has been approved by the Bureaux of Apprentice Testing to work on wage jobs.
Certification: DATE:
Enter YES and the date, if the apprentice has been certified.
Active Apprentice:
Enter YES unless the apprentice has quit or has completed his apprenticeship.
Next, enter the number of hours worked in each month in each year, as the apprentice progresses.
Comments:
Enter any comments you wish.
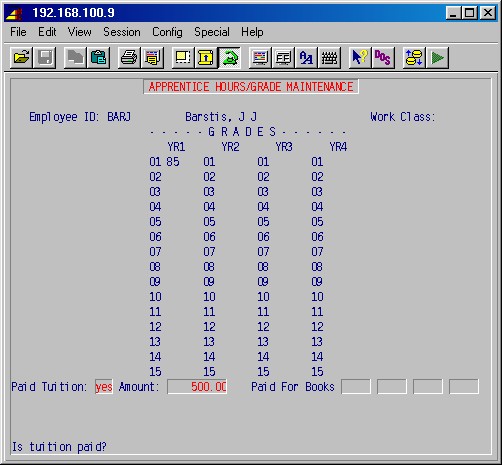
Enter the apprentice's grades as he progresses through modules.
Paid Tuition: Amount:
Enter YES and amount if tuition has been paid.
Paid for Books:
Enter if books have been paid for.
This selection will print apprentice data as entered in 18-17-1 above. You'll be prompted:
Enter Beginning Employee ID:
Enter Ending Employee ID:
Enter a range of employee IDs to list, or just leave blank for all.
This report will list each employee, showing employee ID, name, social security number, date started, class, current percentage of journeyman rate, current rate, journeyman rate (percentage of wage rate entered below) and difference between the two.
Enter Journeyman Wage:
Enter the current journeyman wage.
This report will list each apprentice, showing employee ID, name, date, class and hours.
These procedures will print reports of company vehicles either by employee or by vehicle.
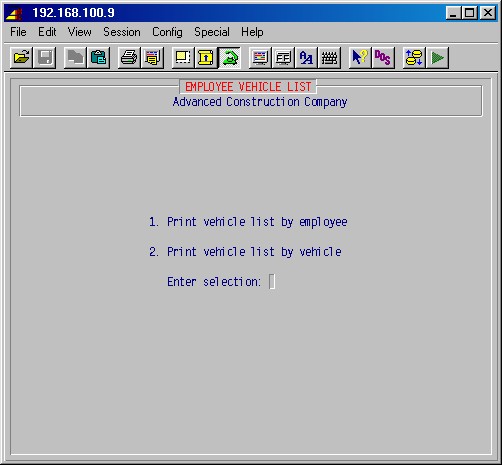
These selections will first prompt for the printernumber and number of copies and your report will be printed and you will return to the human resources main menu.
This report is arranged by employee ID and lists the name, drivers license number, credit card numbers, vehicle ID, vehicle description, vehicle serial number, and tag number.
This report is arranged by vehicle ID, and lists the vehicle description, vehicle serial number, tag number, employee ID, employee name, employee drivers license number, and credit card numbers.
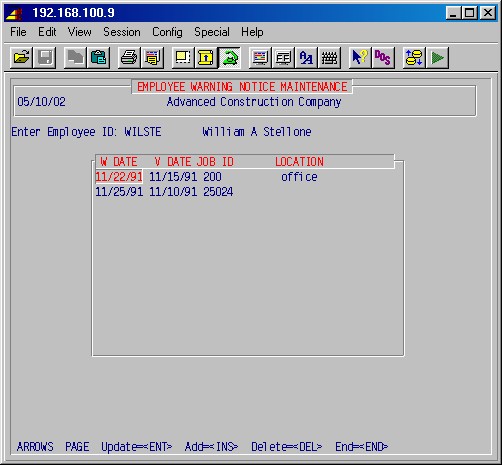
Enter the ID [H] of the employee..
To leave this procedure, leave the ID blank and press ENTER
W DATE
The date of the warning.
V DATE
The date of the violation.
JOB ID
The ID of the job the employee worked on.
LOCATION
The location of the violation.
Use the ARROW, PAGE, ENTER, INS and DEL keys to update, add or delete warnings for this employee. When you are finished with this employee, press END.
When adding or updating a warning, this entry screen appears:
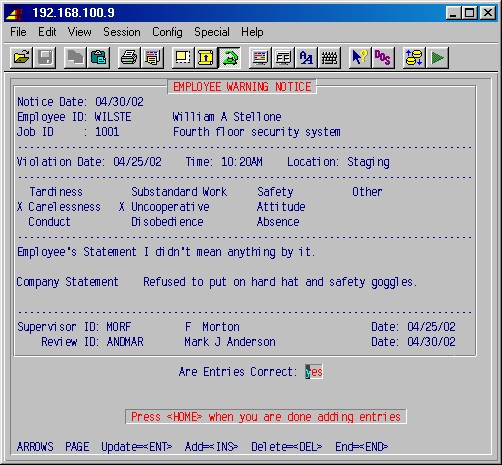
Notice Date:
Enter the date of the notice or warning.
Job ID:
Enter the ID [H] of the related job.
Violation Date:
Enter the date of the violation.
Time:
Enter the time of the violation.
Location:
Enter the location of the violation.
Next, enter an X in front of each of the violation types that apply.
Employee's Statement
Enter the employee's statement on the matter.
Company Statement
Enter the supervisor's or reviewing officer's statement on the violation.
Supervisor ID:
Enter the ID [H] of the supervisor giving the notice or warning, and date entered.
Review ID:
Enter the ID [H] of the reviewing officer, and date entered.Top
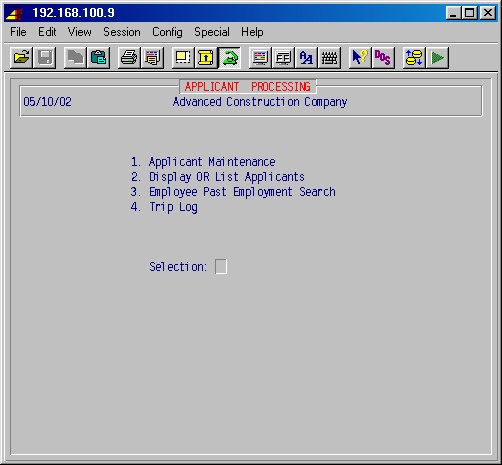
These procedures allow you to input data about job applicants, building a database of information much like the employee history. This applicant data base may then be searched for applicants meeting search criteria defined by you. For example, you could search for all female applicants with specified skills from a specified company who have applied during the previous six months.
This selection will display the following menu:
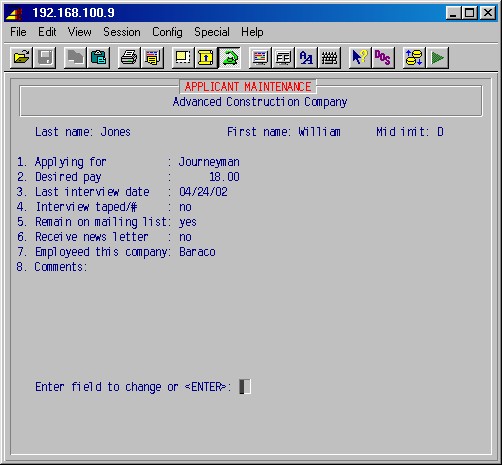
This procedure allows you to input very detailed data from your employment applications to create a database of applicants which may be queried using step 18-20-2 below. This selection will display the following input screen :
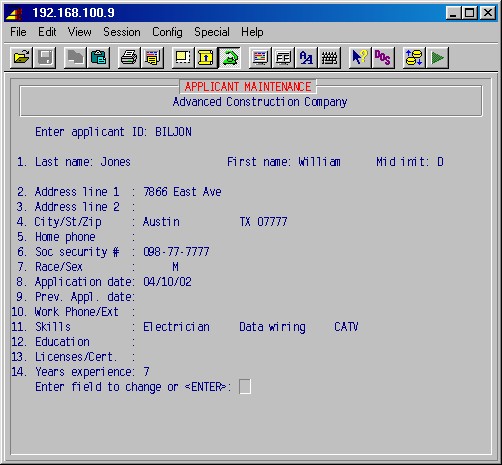
Enter applicant ID
Type the applicant ID [H] (the first three letters of the first and last name works well). If this is an existing applicant, the previously entered information will be displayed which may now be updated. If this is a new applicant, the system will prompt:APPLICANT ID NOT FOUND ADD: NO
Type YES ENTER and complete the applicable fields. When you are finished, you may update the fields by typing the field number and making the change. When you are finished, press ENTER again and the following input screen will be displayed:
TopComplete the applicable fields by typing the field number and pressing enter, entering the data, and pressing ENTER again. When you are finished, press ENTER and the following input screen will be displayed :
Complete the applicable fields by typing the field number and pressing enter, entering the data, and pressing ENTER again. When you are finished, press ENTER and the system will prompt: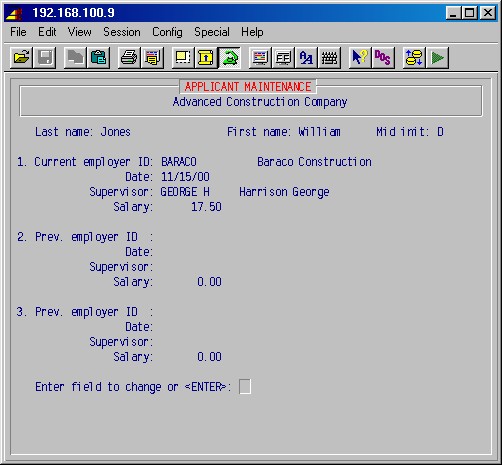
Print This Applicant Information: NO
If you want a printout, answer YES, select the printer number and number of copies, and press ENTER to print your report.
This procedure allows you to search the applicant data base for applicants
meeting search criteria specified by you and display and print this list
of applicants meeting this search criteria. For example, you could search
for all female applicants with specified skills from a
specified company who have applied during the previous six months. This
selection will display the following input screen :
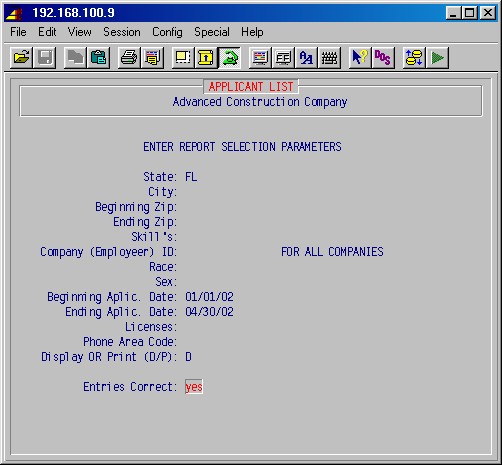
TopSpecify the search criteria you wish by completing any of these fields as applicable. The system will display or print only those applicants that meet all of the criteria you have specified.
If you specify the default, "display", the system will display on the screen all applicants meeting this selection criteria. If you highlight one of the applicants and press ENTER, you will see the complete applicant information entered in step 18-20-1 which may also be
printed.When you are finished viewing this list of applicants, press F1 to exit. You may print a copy of this list if desired or return to the 18-20 menu.
This procedure allows you to search your current employees for a specified employer they may have worked for in the past. These previous employers were entered in 18-9 Past Employment History.
This information is often used to survey your present employee records
to see if they used to work for an employer where an applicant is presently
working. If a match is found, you can interview your present employee to
see if he knows the applicant or has any information
about the applicant's employer which may be helpful.
This selection will prompt:
Enter company ID for search:
Specify the company ID [H] to search for and press ENTER.
The system will display all present employees who used to work for this
employee (if this information was entered in step 18-9.
Press F1 to exit this screen. You may print this list if desired
or just press
ENTER to exit.
This procedure allows you to create and retrieve applicant contact information made on trips.

TopUse the ARROW, PAGE, ENTER, INS and DEL keys to update, add or delete trip entries. When you are finished press END.
For each trip entry you may add as many applicant entries as you want, and each applicant may have as many contact entries as you want.
When adding of updating a trip entry, the following entry screen will appear:
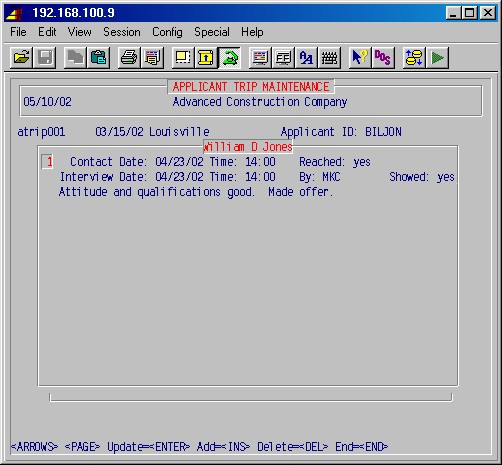
Applicant ID:
Enter the ID [H] of the applicant.Contact Date:
Enter the (scheduled) date of this contact with the selected applicant.Time:
Enter the (scheduled) time of this contact with the selected applicant.Reached:
Enter YES if the applicant was actually reached.Interview Date:
Enter the date of the interview, if any.Time:
Enter the time of the interview, if any.By:
Enter the ID or name of the interviewing person.Showed:
Answer YES if the applicant showed up for the interview.Enter up to three lines of notes on this contact/interview.
Use the ARROW, PAGE, ENTER, INS and DEL keys to update, add or delete contact entries. When you are finished with contacts for this applicant, press END. You can then enter another applicant ID, or just leave it blank and press ENTER.
This selection is used to manage assignment of field personnel to jobs.

TopJOB ID
Enter the ID [H] of the job.NAME
The name of the job.PM
The project manager on the job.LOC
Location of the job (state).ST DT
Date job is to start or started.PJ HRS
Projected man hours for the job.CREW
Number of persons assigned to the job.END DATE
The date when to job will be finished, based on the start date, projected number of hours and assigned number of persons, using five 8 hour work days a week.Press F1 to see a calendar showing number of persons assigned each date for the job. Press END when done with the calendar.
Use the ARROW, PAGE, ENTER, INS and DEL keys to update, add or delete jobs.
Press END to exit this procedure.
This selection will print a four week calendar beginning with the Monday
specified, for a selected range of project managers, grouped by project
manager, one page per project manager. It will first list each job and how
many persons have been assigned on each date
for each job. Then it will list each job showing job ID, name, project manager,
location (state), estimated hours, actual hours to date, projected hours
and variance.
Use this selection to enter how many persons are on vacation on various dates. This will be used when printing the manpower report in 18-21-6.
You will first be prompted:
Enter date:
Enter a date in the month you want to look at or update.
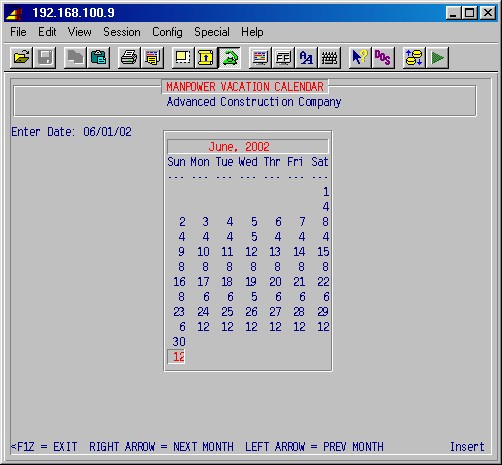
Press the ENTER key to step through each day in the month, entering number of persons scheduled to be on vacation on any given day. Use the right and left arrows to jump to earlier and later months. Press F1 when done.
Use this selection to enter how many persons you have employed in the field assignable to jobs on various dates. This will be used when printing the manpower report in 18-21-6.
You will first be prompted:
Enter date:
Enter a date in the month you want to look at or update.
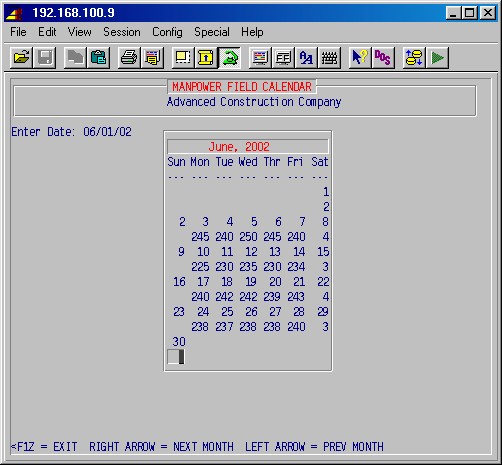
TopPress the ENTER key to step through each day in the month, entering number of persons employed for field work on any given day. Use the right and left arrows to jump to earlier and later months. Press F1 when done.
Use this selection to enter how many persons are on leave on various dates. This will be used when printing the manpower report in 18-21-6.
You will first be prompted:
Enter date:
Enter a date in the month you want to look at or update.
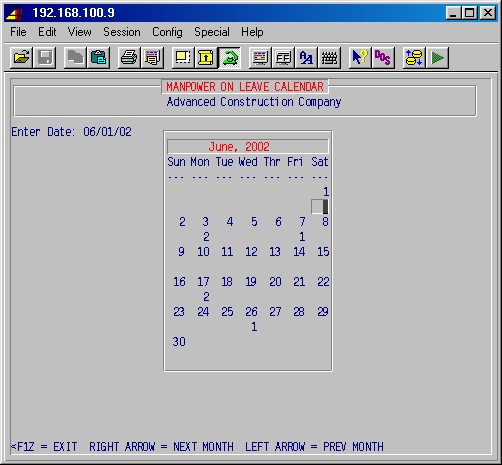
Press the ENTER key to step through each day in the month, entering number of persons scheduled to be on leave on any given day. Use the right and left arrows to jump to earlier and later months. Press F1 when done.
TopThis selection will first print a four week calendar beginning with the Monday specified. It will list a line for each job showing how many persons have been assigned on each date for the job. Then a total line for all jobs, a line showing persons employed for field work (as entered in 18-21-4 above), a line showing persons on vacation (as entered in 18-21-3 above), a line showing persons on leave (as entered in 18-21-5 above) and a line showing the balance (field less assigned to jobs less on vacation less on leave), for each date.
If will then list each job, showing job ID, name, project manager, location (state), estimated hours, estimated hours, actual hours to date, projected hours, variance and projected job completed date.
© 2002 SI Systems, Inc.
2323 Belleair Road
Clearwater, FL 33764
800/422-2277, 727/531-0669
Fax: 727/536-8858